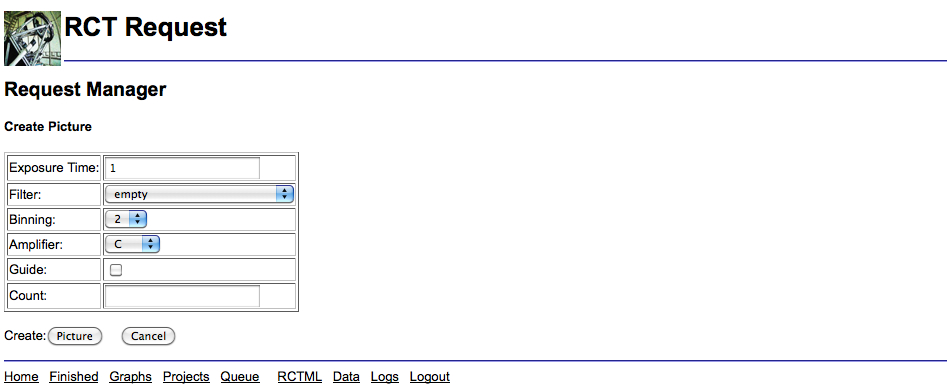
Once you have put in the target data the final step is to input the information about the observation itself ie which filter, exposure time etc. To do this select the radio button on the line with the target information. This will activate the picture button. Select this button to go to a window like the one shown in Figure 1.14 and enter in the details about the observation.
|
Enter your exposure time in seconds, choose a filter from the drop down box (including the option for no filter by selecting empty). In most cases it's best to leave the Binning and Amplifier to their default values. If you have a relatively long exposure then select Guide so that the RCT knows to search your image for an appropriate guide star - for short observations the telescope's own tracking is usually more than adequate. Input how many times you wish this observation to be taken in one block, i.e. if you input 3 into this variable then 3 exposures will be taken all with the same settings. The default count is 1.
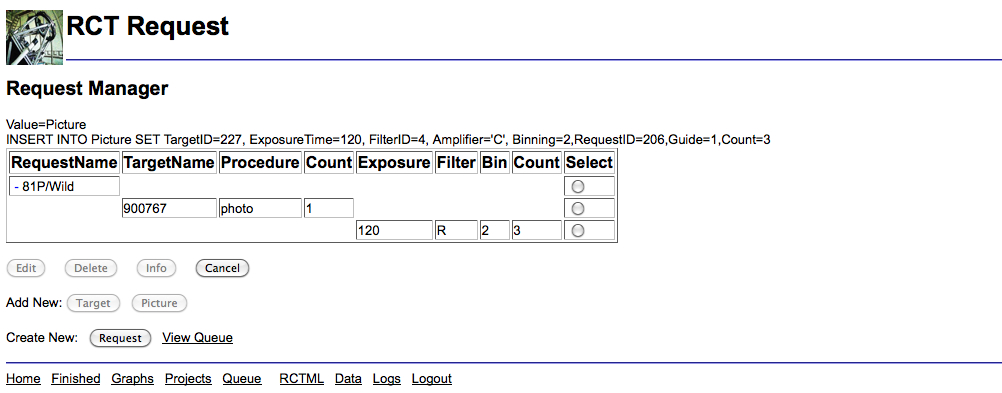
Once you have finished entering your input parameters select Picture to return to the Request Manager and it should look like Figure 1.15
|